s

SmellyBlog

Mexican Inspired Cabbage Salad

We're enjoying an Indian Summer in Vancouver, which is most welcome as summer didn't start till August this year!

So I'm taking the opportunity to share with you 3 salad recipes that I've been immensely enjoying all summer long - celebrating the flavourful fresh herbs that mark the season.

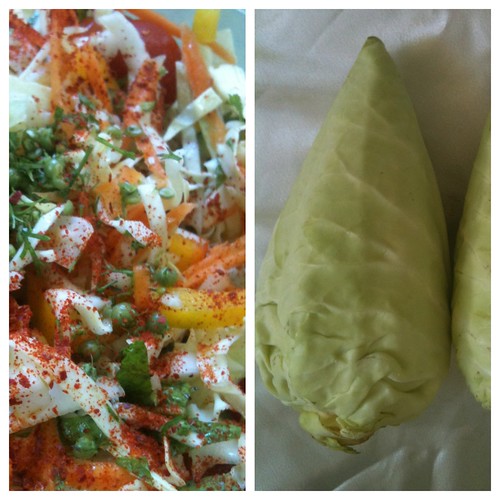
This cabbage salad was inspired by two things: the Mexican cuisine that I've been really craving since my last few visits to California. There is really nothing quite like this food when it's an authentic recipe, made from fresh seasonal ingredients. far departure from the boring jarred salsas and bags of chips...

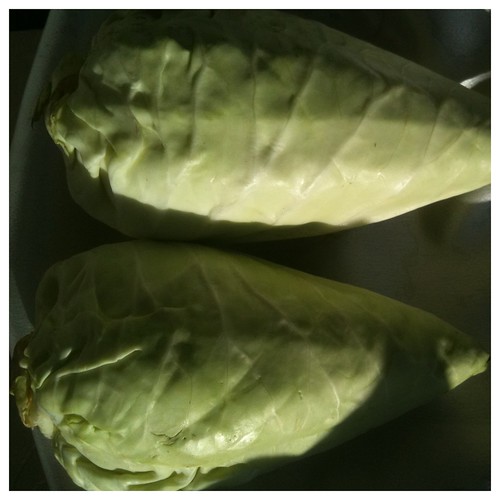
The other important part of the inspiration was the beautiful cone-shaped cabbages I found at the farmers' market. Only one farmer grows them, and they are not only smaller in size (which is more doable for a small family of two, for instance), lighter to carry home, and are so crisp, tender and delicious that they can be easily eaten up within the week (and if not that's ok too, as they keep really well).

We've been mostly eating dinners at the beach all summer, so non-leafy salads, which keep well till dinner time (or even the next day or two, while marinating in flavours) are much preferable over tossed greens (which are also mostly air in volume and are not nearly as filling).
Cone cabbages by Ayala Moriel
Cone cabbages, a photo by Ayala Moriel on Flickr.

I've made this salad with a few variations, but the best of them was when my cilantro plant came to seed and had those fresh green corianders as you can see in the picture.

1 head cone cabbage (or half a larger cabbage), finely shredded by slicing it as thin as you can get with a chef's knife
1 carrot, grated
1 sweet yellow pepper, halved and sliced
10 cherry tomatoes, halved
1/4 sweet white onion, thinly sliced (or use scallions if you prefer)
1-2 green fresh jalapeno, sliced thinly with seeds (the seeds are the part that gives the most heat! So that's your way of controlling the heat level as well).
2 Tbs chopped fresh cilantro leaf (if you have some fresh seeds growing on your plant, feel free to use them as well - simply chop them with the leaves)
1 Tbs fresh peppermint leaves (you could use spearmint, but I like the sharper taste of citrus mint or English mint in this recipe)
1 tsp Korean pepper (this is a hot pepper with the seeds removed; it has a deep, sweet flavour but not nearly as spicy as other chiles; if you can't find it you can use crushed chiles or non at all - this part of the recipe is mostly for the colour anyway).

For the dressing:
Juice from 1 lime
1 Tbs apple cider vinegar
1/2 tsp agave syrup
1-3 Tbs vegetable oil (I use grapeseed oil, but you may also use sunflower seed oil, almond oil or avocado oil for a more intense flavour).
Sea salt to taste

Prepare all the ingredient and add to one large bowl. Dress immediately (you do not need to mix the dressing ingredients separately, by the way) and let the salad marinate in the fridge until serving time - at least 1/2 hour, and up to 2 days. Makes a perfect picnic dish, alongside blanched almonds or roasted hickory smoked ones. Also goes well with vegetarian quesedillas, corn-on-the-cob, or as an additional topping for fish tacos or any other white fish dishes.

Blueberry Upside Down Cake

Happy Labour Day!

Summer is not quite over yet, so I'm taking advantage of all the flavourful fruit still available, as well as the bit of free time before we switch gears into the fall/winter madness.

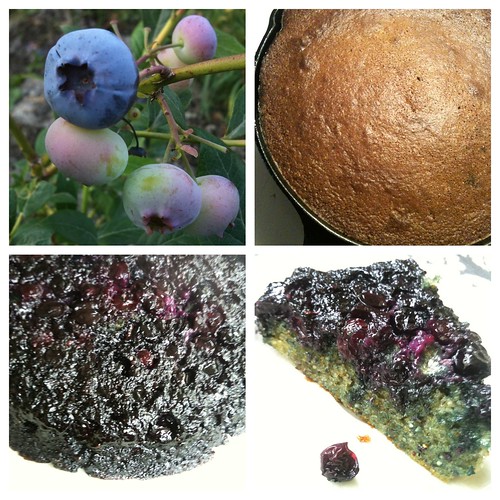
This blueberry upside-down cake is adapted from by Bettina Schorman, from her cookbook co-authored with chef Jeff Crump: Earth to Table: Seasonal Recipes from an Organic Farm.
The recipe there is excellent, except that it’s sweetness of way over the top to my taste (and I have a sweet tooth, believe me!). I felt a deep urge to not only reduce the sugar and substitute it for honey in the glaze for the fruit; but also add lemon zest to balance the fruit’s sweetness. Also serving with crème fraiche makes all the difference!

For the blueberry & glaze:
In a 10” cast iron skillet or cast iron pan, melt 3 TBS each of butter and bluberry honey (or any local honey of your choice). Cover with 2-3 cups of fresh blueberries (you want to create about an inch-deep layer of berries at the bottom of your pan). I personally do not own a skillet but simply a cast iron frying pan; so for this recipe – I need to muster to the task my smaller frying pan (7”) as well and divide the recipe between the two.

Pre-heat the oven to 350F.
In the meantime, put together the ingredients for the cornmeal batter:
1cup (2 sticks) unsalted butter
¾ cup raw cane sugar
zest from 1 lemon
2 tsp pure vanilla extract
4 large eggs
1 ½ cups all purpose unbleached flour (preferably organic)
¾ cup purple cornmeal (yellow will do just fine too; but will affect the colour)
1TBS baking powder
½ tsp sea salt
¾ cup buttermilk

Sift together the dry ingredients.
Beat butter and sugar until smooth. Add vanilla extract and eggs – one at a time.
Pour over the flour mixture. Continue beating. Add buttermilk. Pour over blueberries and bake in the pre-heated oven for 30-50min, or until a toothpick (or a cake tester) comes out clean.

Remove cake from oven once ready, and wait 10-15 minutes to slightly cool off. Run a knife around the edges of the cake. While cake is still warm, invert it on top of a plate, tray or cake case.

Serve warm or at room temperature, alone or with a spoonful of crème fraiche.

There is something to be said about fruit desserts. They are the best, in my humble opinion – where the pastry is there solely to present the fruit and highlight its elegance and singularity. In this one the cornmeal adds an interesting colour (you will get a beautifully bright yellow, which will contrast nicely with the purple bluebberries as well) - but most importantly, a slightly crunchy and sandy texture; and a delicious, rustic yet delicately sweet flavour of polenta. Admittedly, sometimes I feel that cheesecakes and anything vanilla flavoured are the best. If you serve this with crème fresh or crème chantilly (vanilla flavoured whipped cream) – you get the best of both worlds, which to me is as perfect as dessert can be.

Summer is here! Yay!

Summer is finally here at long last (well, the Vancouver version of it, featuring a rare sunrise and temperatures kissing the recommended room-level).
To celebrate, miss T and I are making raw coconut macaroons, and our busy schedule hasn't allowed us to go for an official summer picnic yet, but this will have to come in good time too. Not just because I'm crushed that I can't find any Hail Merry macaroons anywhere (and they don't ship to Canada); but also because there are too many vegans/gluten-free guests at my tea party (this fad has become a staple fashion item among Vancouverites - it's so stylish to be picky about food, not that this would scare me...).

So here it is for you - a very rough recipe, because honestly, you need to trust your fingertips to figure the right consistency of these heavenly unbaked treats.

Ingredients:
1/4 cup virgin coconut oil
1/2 cup maple syrup
2 cups dried, unsweetened coconut
1 cup almond meal (blanched, ground almonds)
1 tsp Haitian vanilla extract
1/4 tsp fleur de sel or sea salt of your choice

If you live in Vancouver, begin by melting your coconut oil (if you live somewhere where there's real summer, coconut should not be solid at the end of June...). Add maple and vanilla and stir, gradually mixing in the almond meal, salt and coconut. When you can no longer stir with a spoon, start kneading with your bare hands. Form into neat little balls - either the size of chocolate truffles, or small macaroons.
You may eat them as they are, or refrigerate for a more firm texture (refrigerating is especially a good idea if you live in a warm climate, with real summer, you get the idea...).

2nd Annual Mother's Day Tea Party

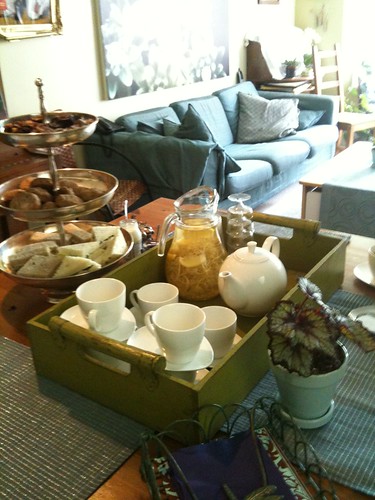
Mother's Day Afternoon Tea
Another fragrant tea party has gone by... This time in honour of Mother's Day that's fast approaching (May 13th). Studio guests enjoyed 20% off this afternoon; and online shoppers will continue to receive 15% off their purchases thru May 15th with a coupon promo code - for more details subscribe to our newsletter!

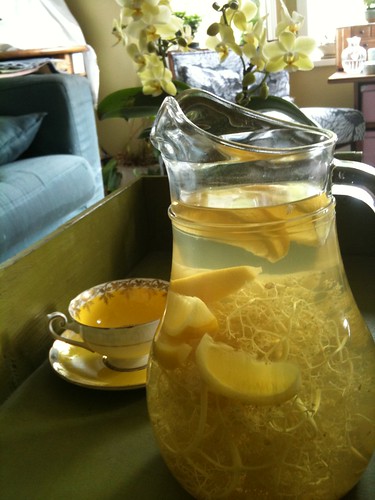
Edlerflower Cordial

Getting ready for a tea party always starts at least a couple of days early... This cordial of fresh elderflowers was made the night before, as it requires an overnight steeping (some recipes even call for 48 hours!). I got these at the farmer's market, but you can find them in Stanley Park now - they should be around for a few more days (flowers usually have a rather short season).

Elderflowers smell peculiar: a combination of delicate and overpowering; repulsive and sweet. The closest way for me to describe them is that of guava fruit with hints of black currants - although far more subtle than either. You must try to make a cordial yourself to really enjoy it. The store bought ones that I've tried were not only unimpressive - but quite disappointing in that they tasted like preserved lemon juice.

Instead of making simple syrup infused with the flowers and preserved with citric acid (yuck!) I decided to enjoy these beautiful, fresh and delicate flowers fresh, and create a "iced tea" of sorts. I boiled 1.5L of water, poured over the elderflowers, and one wedged lemon (organically grown and unwaxed). I Added 1/2 cup of evaporated cane sugar and steeped it overnight. Chilled in the morning, and by the time the guests rolled in, there was a refreshing, fragrant drink awaiting them: I poured half a glass of the "cordial" and the topped it off with San Pellegrino and it was divine. No one even wanted to try the G & T's that was on the menu!


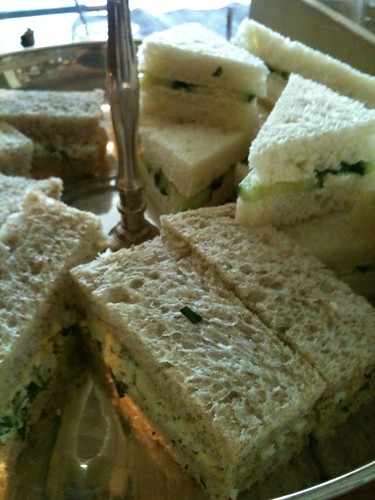
Classic Tea Sandwiches

The simplest classic tea sandwiches are always the best, in my opinion. This time around I served only two flavours: cucumber sandwiches, and egg salad recipe (which I season with mustard, freshly grated pepper, dill and chives).

photo

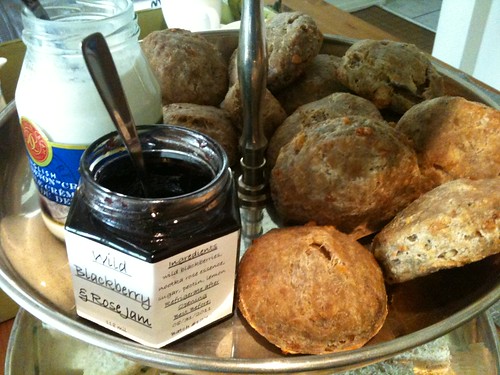
Scones are almost always my favourite of the tea party tray. Especially if they are served warm and with clotted cream and quality preserved fruit. These scones are made with sheep's cheese and wild mountain thyme from my home village, which my lovely sister-in-law picked and sent me - especially from the Galilee in Israel!

The savoury thyme and cheese serve a refreshing contrast to the decadent rainforest harvested jam of blackberries and wild roses!

photo

And last but not least - the sweets. Sometimes, you might not have the time, mood or energy to put together a full dessert tier. This was meant to be a laid-back gathering so I only invested in the hazelnut brownies (which I made with teff flour), which is very rich and satisfying all on its own - but added some dates and salted caramels for those who wanted a little extra something, which also slightly accommodated my unexpectedly vegan guests. Dried fruit are always a wonderful treat and are healthy in more ways than I care to describe here. Always good to have them around (or in your bag, in case you get stranded...)

Perfume-Inspired Recipe: Tropical Snowballs

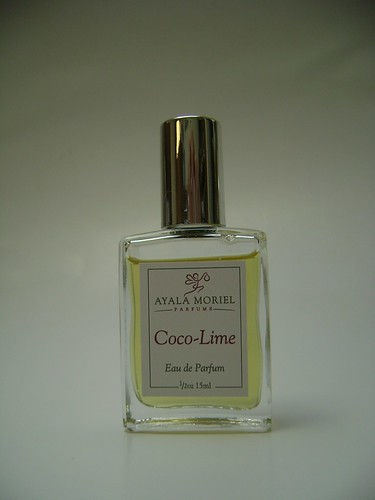
The flavour is inspired by my tropical fantasy, aka Coco-Lime limited edition perfume (it came out in the summer and was snatched away before I was even able to post it on my website)!

Snowballs are my favourite holiday cookie, not only because they are melt-in-your-mouth delicious and look pretty and dainty - but also because they require very little equipment! This recipe is a spin-off on our favourite home recipe. It's also a great winter past-time activity, as even little kids can easily form them into neat little balls. In fact, aside from making the dough and handling the hot cookie sheets - I let my daughter take charge of the whole process from start to finish!

Ingredients:

1/2 cup (1 stick) unsalted butter, at room temperature

1 cup unbleached white wheat flour (or - for the gluten free option, use 1/2 cup each brown rice flour and tapioca starch, plus 1/4tsp xanthan gum)

1/4 cup icing sugar, plus more for coating

1/4 tsp Salt

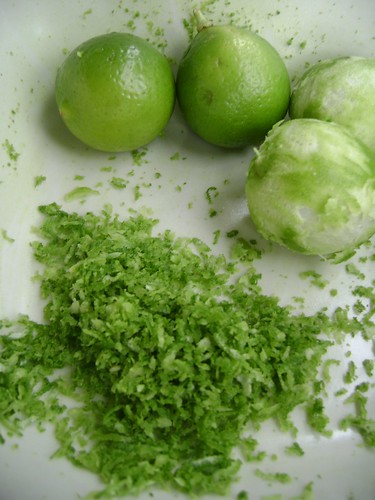
Lime zest from 1 Lime

1/4 cup finely shredded coconut, unsweetened

1/3 cup roasted pistachios, peeled and slivered (be sure to use bright green fresh pistachios!)

1 tsp pure vanilla extract (or use vanilla paste if you have - it's amazing!)

Zesting Key Limes for Key Lime Pie

How-To:

- Combine flours (and xanthan gum, if opting for the gluten free ingredients) and salt

- Mix butter with the dry ingredients, until it is relatively smooth

- Add the coconut and pistachios and blend well with crumbs, using your hands

- Add the vanilla and continue to knead dough just until it can be formed into a big ball, and wrap in a plastic wrap.

- Refrigerate dough until firm - for about 1-3 hours.

- Line a cookie sheet with parcment paper or Silpat

- Form the cookies using a melon scooper for even shapes and identical dainty sized snowballs!

- Bake for 12-14 minutes (until they barely begin to become golden)

- Cool for 3-4 minutes, just until they can be handled without hurting your fingers!

- Roll in additional icing sugar.

- Cool completely on a wire rack

- Transfer into an airtight container. They will keep for 2 weeks and make a perfect gift, packaged in reusable cookie tins or jars.

* Equipment you will need for this recipe:

Large cookie sheet

Parchment paper or Silpat sheets

Measuring spoons and cups

Citrus zester/grater

Hand mixer

Wire rack and a large tray for cooling off your cookies

Coco-Lime Summer Limited Edition EDP

Coco-Lime limited edition perfume:

Coco-Lime
Citrus, Gourmand
Tropical cocktail of squeezed lime and coconut milk, and everything else that goes with. Coco-Lime is a mouthwatering beach fantasy in a bottle. Fun and invigorating!

Top notes:
Key Lime, Lemon, Grapefruit, Lime

Heart notes:
Ylang Ylang, Lemon Myrtle, Litsea Cubeba

Base notes:
Coconut Absolute, Massoia Bark, Vanilla CO2, Ambrette (Musk) Seed

Back to the top