s

SmellyBlog

Butternut Squash & Sage Scones

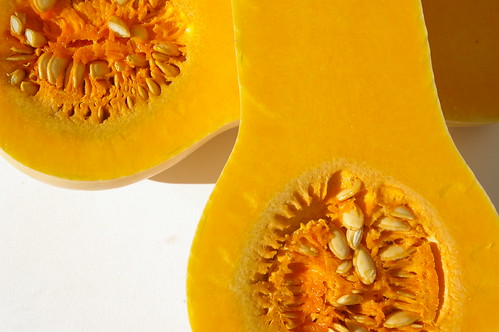
I'm a sucker for pumpkins. If it wasn't for their humungous size, and my inability to store them properly after slashing them open, I would be making something with pumpkin every week. That's why I love butternut squashes so much: they are usually small enough that I can easily use them up even in my small household of two. In addition, they have less water content, more flavour, and a creamy texture that makes them versatile for both savoury and sweet dishes and pastries. The following recipe is adapted from The Joy of Baking pumpkin scones recipe (which is really good as well!).

Ingredients:
2 cups all purpose flour

1/3 cup cornmeal (fine, not grits!)

2 Tbs light brown sugar

1/2 Tbs sage leaves, dried and rubbed (or 1 Tbs or fresh, chopped sage leaves)

1/4 tsp ground dry ginger

1/8 tsp Nutmeg, grated

1/4 tsp Allspice, ground

1 teaspoon baking powder

1/2 teaspoon baking soda

1/4 teaspoon salt

1/2 cup (113 grams) cold unsalted butter, cut into pieces

1/3 - 1/2 cup (80 - 120 ml) buttermilk

1/2 cup (120 ml) cooked and pureed butternut squash

1 teaspoon pure vanilla extract

Egg Wash:

1 large egg

1 tablespoon milk or cream

How to:
- Preheat oven to 400F (200 C)

- Blend dry ingredients together

- Cut butter into dry ingredients

- Whisk the eggs and mix with the butternut squash and buttermilk

- Add to the dry ingredients and stir

- Knead briefly, just to form a soft, pliable dough. It should be soft but not too sticky (add flour if necessary)

- On a lightly floured surface, pat down or toll to about 4cm thick. Cut with a medium sized cookie cutter. It helps to dip the cookie cutter in flour in between scone-shaping.

- Place the cut out scones on a baking sheet lined with parchment paper or a Silpat sheet.

- Brush with egg and milk mixture. Sprinkle with allspice, some sugar and a hint of nutmeg.

- Bake for 20 minutes, or until golden brown and a toothpick insterted in the middle comes out clean.

These scones are quite versatile in how they can be enjoyed - if you want them for an afternoon tea with other sweets, serve with Devonshire cream and a peach or apricot jam, orange marmalade or light honey.

For dinner or lunchtime, they make an excellent accompaniment for a hearty soup; or as a snack of their own with a slice of sharp cheese.

Happy (Belated) Canadian Thanksgiving!!!

I've been up to my neck (in a good way!!!) celebrating Thanksgiving and although my greetings to you, my dear readers comes in late, I hope this post will be inspiring for those of you down to the south of the border so when your Thanksgiving rolls around you'll have more than sufficient ideas, inspirations and recipes for your celebration. Mainly, I want to get you excited about vegetarian recipes, because almost all across North America, this holiday is so strongly associated with eating a stuffed turkey. I've been vegetarian since birth (and only recently succumbed to eating creatures of the sea, as I feel my body needs just a little of extra boost of vitamin D to compensate for the year-around shortage of sunlight in Vancouver).

For a few years now, I had a fantasy of convincing some friends to celebrate Thanksgiving with me without the turkey (the vegetables "side dishes" are more than filling anyway, don't you think?).

Instead of stuffing a turkey, I cooked what I do best: Turkish-style stuffed vegetables. There is hardly any vegetables you can't stuff, and although many Arab recipes call for ground red meat in their stuffed vegetables, I used the same stuffing used in grapevine leaves to stuff all the other vegetabls I laid hands on (all avaialable from the farmer's market this season!): cabbage rolls, stuffed zucchinis, stuffed peppers (I used poblano peppers, which are more spicy and robust in flavour, especially after roasting them in olive olil... Mmm...), stuffed Roma tomatoes and red Spanish onions. It was all heavenly!

This year my dream Thanksgiving dinner finally came true. To me this was a meaningful moment: perhaps Vancouver really this is my home, at long last. I certainly have dear friends here who are happy to play along my vegetarian menu and try something different and beautiful that symbolizes abundance and supports local agriculture.

To make the rice filling:
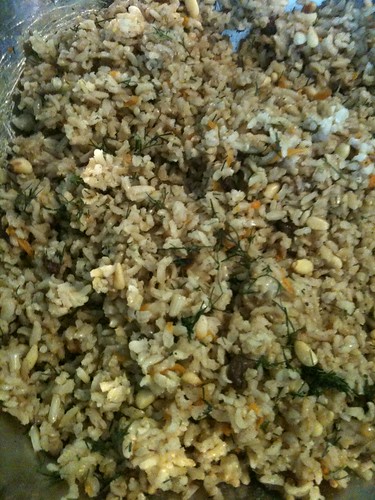
Basmati Rice Stuffing
3 cups brown basmati rice (soaked for an hour or overnight, and drained well)
1 large diced onion (plus any of the interior of the onions you were going ot use for stuffing but weren’t able to separate into layers)
1 Tbs olive oil
Remainders of other vegetables for stuffing (i.e.: the flesh of zucchini, eggplant, etc.), minced
1-2 large carrots, grated
2 large bundles of baby dill, finely chopped
1 large bundle of spearmint leaves, finely chopped
1-2 tsp salt
1-2 tsp allspice, ground
1 tsp freshly ground black pepper
1⁄2 cup or more pine nuts, toasted (you may substituted for blanched, chopped and toasted almonds)
A handful of raisins (optional)
4-6 cups of boiling water

Sautee the onions in the olive oil. Add the minced vegetables and grated carrots. Sautee and add the rice and keep stirring for about 2 minutes. Add boiled water (4 cups at first, and the rest only if necessary – i.e. if the rice does not cook well).

For the sauce:
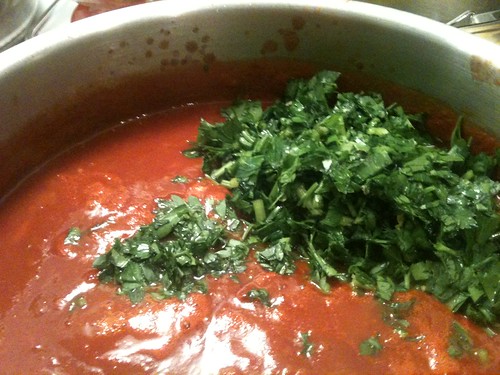
Red sauce for stuffed vegetable
1 large onions
1 Tbs olive oil
3-6 cloves garlic, minced
3 Tbs. red wine
1 green bell pepper, diced
4 celery sticks, cut lengthwise and thinly sliced
2 carrots, grated
1 Can Pureed Tomatoes
4 whole clove buds or ½ tsp ground cloves
1 cinnamon stick or 1 tsp ground cinnamon
1 tsp allspice, ground
2 bay leaves, whole
½ cup parsley
½ cup fresh dill
1 Tbs. raw cane sugar (optional)
Salt and pepper to taste

Sautee the onion till it is golden in colour. Add the celery and the pepper and sautee till they soften a bit (about 3 minutes), and lastly – the garlic. Add the carrots and any other minced vegetables cores that you got from preparing the stuffed vegetables. Add the wine and cook for 30 seconds or so. Add the canned tomato puree and spices, sugar if desired, and bring to a simmer and cook for about 20 minutes. Add the dill and parsley at the very end.

To prepare the vegetables:
Begin with preparing the vegetables for stuffing – and remember to reserve the parts removed from the core of each vegetable (except for the pepper seeds…) for the stuffing or the sauce.

Peppers:
Choose peppers with thin "skin", such as Poblano (which are very dark green peppers also spicy when fresh, and piquant and robust once baked), or Cubanelle (pale green peppers and also very thin), or even sweet banana peppers. Cut off the tops. Leave the stems on to make nice little "lids" to cover the peppers once stuffed. Bake in the oven in 375F in olive oil pyrex pan for 45-60 minutes.
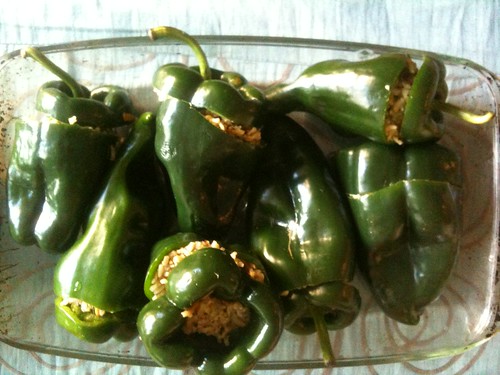
Stuffing Poblano Peppers

Mini summer squashes:
Cut a circle around the top as you would with a pumpkin, and reserve to create a "lid". Scoop out some of the flesh with a melon baller. Bake in the oven in 375F in olive oil pyrex pan for 30-45 minutes.

Eggplants:
For stuffing purposes, I prefer the dark purple eggplants rather than the Japanese eggplants (whose skin is too tough and waxy). Select small ones, which you can cut into two and scoop out the flesh with a melon baller. If you can only find large eggplants, slice into very thick slices, and remove some of the flesh to create an indentation for the stuffing. Bake in the oven in 375F in olive oil pyrex pan for 45-60 minutes.
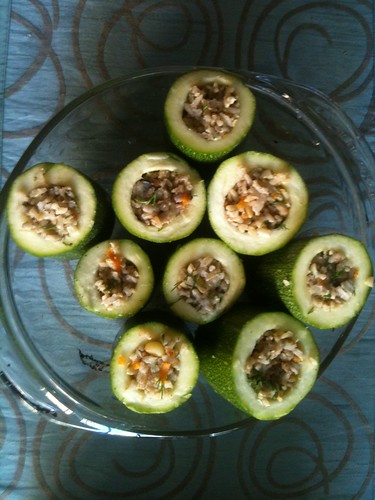
Stuffing Zucchinis
Zucchinis:
Choose small zucchinis, which are just long enough for a potato peeler to be inserted into them to carve out the core. Arrange the zucchinis laying down in the pan when using small ones. If you can only find long zucchinis, cut into halves (or more pieces as needed) and do the same, keeping a bottom piece undamaged so it can keep the stuffing in. You can make them all have a flat bottom, and arrange them standing upright in a bread-pan. Bake in the oven in 375F in olive oil pyrex pan for 30-45 minutes.

Tomatoes:
Cut the top and hollow with a melon baller. Place in a deep pan immersed about halfway through in olive oil. Bake in the oven in 375F in olive oil pyrex pan for 30-45 minutes.
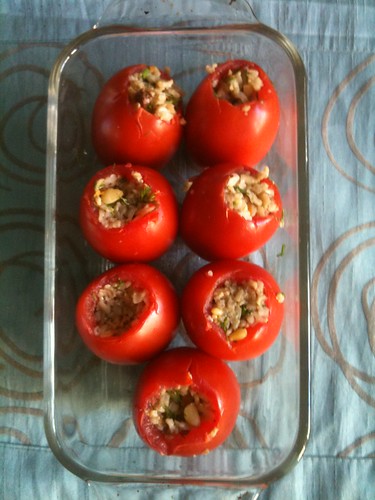
Stuffing Roma Tomatoes

Onions:
Cut into halves lengthwise, and carefully separate into its layers. The very core can be used for the sauce or the stuffing. Bake in the oven in 375F in olive oil pyrex pan for 20-30 minutes.
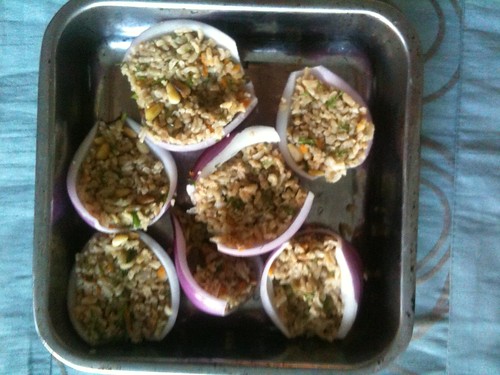
Stuffing Onions

Cabbage Leaves:
Cabbage leaves require softening before you can roll them around the stuffing. Salt water will do the trick! Boil a large and deep pot of water with 1 Tbs sea salt. Cut around the base of a whole savoy cabbage (their leaves are easier to separate). Insert a fork into the base (aka stem) of the cabbage so it's easier to turn it around in the boiling water as you remove the leaves. Stuff them by placing a couple of tablespoon or more of the rice filling and roll around. You can either arrange in layers inside a pot, or in a pan (I like to layer mine with olive oil, the tomato sauce, than put the cabbage rolls and cover with tomato sauce). Bake covered with aluminum foil for 30-45 minutes. You may want to remove the foil at the end of the baking time for 10 minutes for getting a slightly caramelizing effect on the sauce - which is simply delicious!
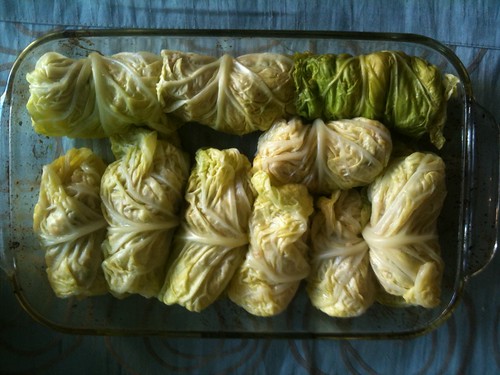
Cabbage Rolls

And this is how they come out of the oven (well, that's really left overs because there was not enough light the night of the dinner party...):
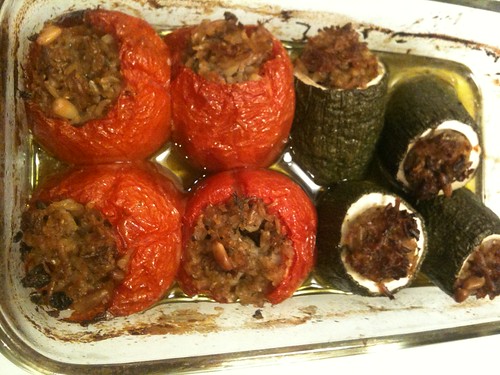
Stuffed Tomatoes & Zucchinis

Served with hot tomato sauce poured on top, and some yoghurt drizzled around the plate or in small side dishes. It's the best harvest dinner I can think of - for both Sukkot and Thankskgiving.
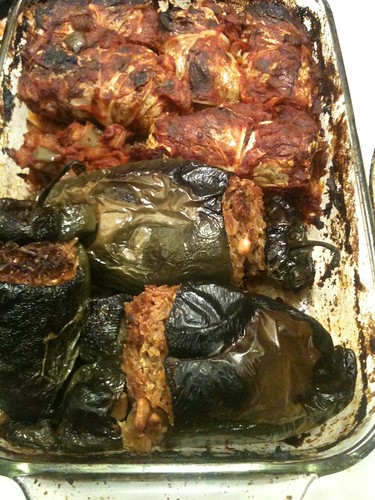
Stuffed Peppers & Cabbage Rolls


Pearfection

Pearfection

The best desserts are made of three layers. And frangipane tarts definitely fit this category. I've been craving pears really badly recently (which is not a problem, really, considering that they are in season), and so I've decided to finally challenge this desserts, which is not only difficult to come by in North American pastry shops, but also seems very intimidating to master even for an enthusiastic baker like me.

I can't decide which layer I like the best - the almond cream or the fruit. For the sake of simplicity, let's begin with poaching the pears...

Poaching Pears for Frangipane Tart
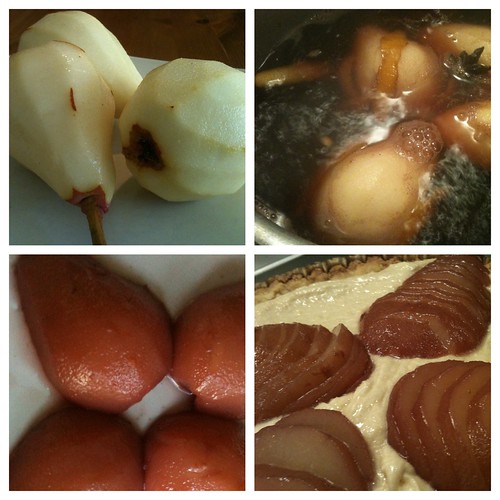
To poach the pear, take 3 ripe yet firm pears, peel them and cut into halves. Scoop out the core with a melon scoop. Cook in a wine and sugar and spice syrup.
I used:
4 red (Anjou or Bartlett) pears
2 cups red wine
4 cups water
1 cup sugar (which I honestly think should have been reduced by half)
Rind and the juice of one Meyer lemon
1/2 vanilla bean, split lengthwise
2 whole star anise (which I think could have been reduced to only one)
- Bring the syrup to a boil and cook for 5 minutes.
- Add the pears and reduce the heat. Simmer for 20-30 minutes.
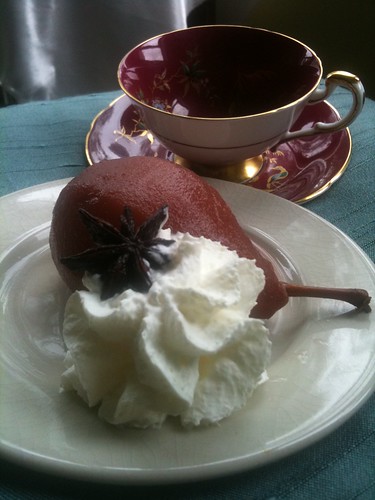
- Cool the pears while being immersed in the syrup. They can be served in any temperature in my opinion (room temperature, warm or cold), on their own, or with a dollop of whipped cream.
But if you want to turn this into a decadent and elegant pastry like pear & almond frangipane tart, proceed to making the crust... Which is reserved for the next post.
By the way - you will only need 2 pears for the tart; but it's good to have extra ones, in case a pear gets broken or mushy. Besides, the poached pears are so delicious that I guarantee you'll want to eat them on their own and 2 won't be enough!

Best served with an osmanthus oolong or a milky oolong.

Pear and Almond Frangipane Tart

Pear & Almond Frangipane Tart
Frangipane tart was in my dreams for longer than I can remember... Maybe it's the name, which reminds me of a beautifully scented tropical flower that brings fond memories of summers in Tel Aviv. But most likely, it's the seductive, velvety appearance of the dessert's middle layer, partly concealing the fruit in the most seductive of ways...

When passing by a bakery in Paris (May 2009) that had a similar apple tart in their window, I promised myself to get a slice when I return to the apartment where I was staying... By than it was closed, of course. And the next mornings, I passed by it too early in the day before it opened. So there was my chance to have a frangipane tart Parisienne... It's actually a specialty of the region of Bretton, where it is traditionally baked with apples. The variations on this theme are countless - usually almonds, but sometimes other nuts (pistachio, hazelnut...) and most commonly the fruit is from the rosacea family (apple, pear, apricot, plum, cherry...).

Fortunately, I found a great recipe with a crust that is super easy to make - Dessert First' adaptation of Dorie Greenspan's recipe. So, I got myself a tart pan with a removable bottom for the first time in my whole life. From this point, there was no return. Unlike many other frangipane tarts, you don't need to roll out the dough (which is the single most intimidating part about tarts: the dough is always full of butter, which must remain cold and not be over worked for the pastry to turn out flaky and light). It's difficult to roll cold butter (try it!) and I find it quite frustrating. Besides, you end up with a counter covered in sticky dough and flour...

The other think I love about this recipe is its efficiency in using up all the materials. The dough requires one yolk. There is nothing I like less than wasting half eggs after working so hard to separate them... So I was excited to discover that in this recipe, since the frangipane part (aka the almond cream) requires one whole egg and one egg white, the extra egg white remaining from the crust will not go to waste. Phew...

Begin by poaching the pears (previous recipe). 

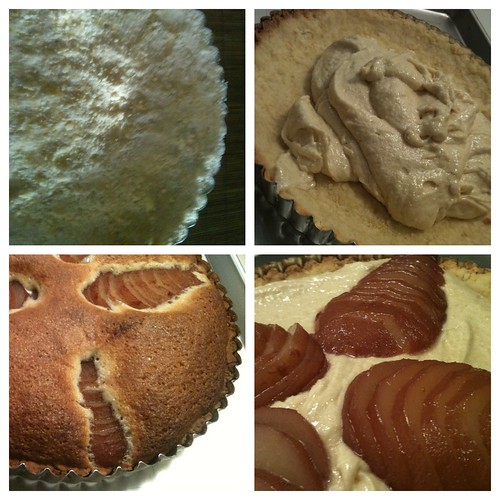
The Making of Frangipane Tart
Pâte Sablée

1 1/2 cups flour

1/2 cup powdered sugar

9 tablespoon very cold salted butter*, cut into small pieces

1 egg yolk

Mix the flour and powdered sugar.
Cut the butter in and blend with a manual pastry blender until tiny crumbs form.
Add the egg yolk and knead as little as possible - just until it can form a ball of dough.
Press the dough into a 9" tart pan (with a removable bottom). Excess dough will be used later to patch up the crust after the 1st round of baking...
Freeze for 30 minutes or until the almond cream is ready and you're ready to bake the tart!
When you are ready, preheat the oven to 375F. Cover the tart dough tightly with a sheet of buttered aluminum foil and bake for 25 minutes, until the crust becomes dry and slightly golden.
Take out of the oven, remove the buttered aluminum foil, and let cool completely before adding the frangipane cream filling...

And while the crust is chilling in the freezer or out of the oven - make the almond cream (which is the Frangipane itself!). This is actually the easiest part of the whole thing (aside from eating the tart...). By the way, it is named after the Italian marquis Frangipani, after whom the flower is named as well (the reason for that being, that the Frangipanis worn the first scented gloves of that particular combination - containing a large amount of orris, by the way... When the flower (Plumeria alba) was found, it reminded its discoverers of that same Frangipani perfume, and named the flower after it... Frangipani in Italian means "Breadbreakers". So... If you can't find bread, eat frangipane!

Frangipane
(Almond Cream Filling)

6 tablespoons salted butter*, at room temperature

2/3 cup raw cane sugar

100gr ground blanched almonds (which, fortunately, is the entire bag of blanched ground almonds you get in most grocery stores).

2 teaspoons flour

1 teaspoon cornstarch

1 large egg

1 egg white
(remaining from making the crust!)

1 teaspoon pure vanilla extract

2 teaspoons pure almond extract

Blend all ingredient with a mixer. Fill the partly baked crust only after its cooled down completely to room temperature. If the crust needs any patching with more dough - now is the time to do it.
Fill with the almond cream (it should be a little on the firmer side, but still easily spreadable evenly within the tart shell. Slice the poached pears into 3/8 thick slices. Place on a flat spatula and transfer 4 halves of pear in total onto the frangipane filling. Press a little so that the slices separate nicely atop the tart.

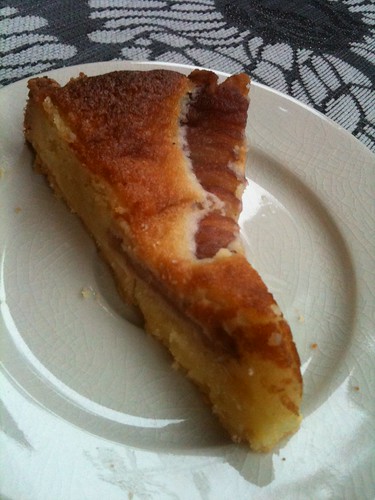
Bake the whole tart until the almond cream filling is golden and puffy. Watch your oven closely, and listen to your nose to check the tart before your timer goes off! Mine took only 30 minutes to bake, instead of the 40-45 minutes the recipe anticipated it would take. You may want to garnish it with powdered sugar, or brush with a light coloured jam (i.e.: peach or apricot) but I find either unnecessary. This tart is sheer perfection just the way it is!

Serve the frangnipane tart in room temperature (if you don't think you'll finish it within 2-3 days, store on the fridge, but you MUST bring it back to room temperature before serving. It's also delicious while still warm and fresh from the oven, which is how I enjoyed it for the first time around 9pm on September 28th... It's not really that complicated, but it does have quite a few stages and a fair amount of waiting and cooling - and since I was doing other things that day, it took me the entire day to complete this dessert. At the end of the day, I found it to be more satisfying than other layer cakes I've baked in the past (Gianduja, Tiramisu, Black Forest Cake...). Certainly a day to remember!

* A little note about the butter: most recipes for pastries and sweets call for unsalted butter. Which is really clever, except that they always add more salt in the end... If only unsalted butter was not twice as much as the salted, I'd say go for it. But since the recipe asks for salt anyway in the end, why not save the time of measuring and save a few dollars, and opt for the salted butter... That's what I keep on hand anyway for miscellaneous butter uses.

Blue Plum Cake

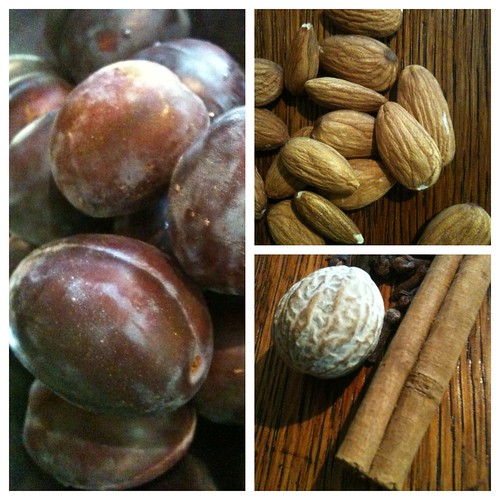
Italian Plum Cake Ingredients

Harvest season is fast approaching, bringing forward some of my favourite fruit and the funnest thing to do on less than perfect weather days - baking!

The Italian plum cake recipe I'm about to share with you is a spin-off the apricot almond cake I've been baking at least once (if not twice!) a week ever since apricots decided to ripen. Only in this one is gluten free and warmed up with some spices.

The plums you should use are the Italian plums, aka blue plums or prune plums. These and sugar plums are the only plums you can split open and pit without squeezing their juice out recklessly... These plums always appear dusty when picked up fresh from the tree, and that dust gives their naturally purple skin a surreal blue hue. The dust or powder is, in fact, natural fruit enzymes that assist in digesting them. Therefore, I don't even bother with washing them, but I'll leave that decision up to you.

I've also added some spices, and of course you can feel free to leave them out if you are not into these spices, or come up with your own spice combination you like for these special plums. The almonds this time are unblanched. So grind up some whole or sliced almonds in a coffee grinder for this recipe. It will give the cake a nicer flavour. I find that sliced almonds have a fair amount of bitter almonds among them, which make their flavour even more perfect for the cake (in which case, you may not need any bitter almond extract at all!).

My first time I made it with cinnamon, cloves, allspice and nutmeg, which is the typical Eastern European pairing with prunes as in Povidl (prune plum butter). The 2nd time around I've decided to experiment with black cardamom - my newly found farouvite spice. I'm pleased to announce that the results were phenomenal!

Italian Plum Cake
10 Tbs salted butter, at room temperature
2/3 cups evaporated cane sugar
3 eggs

1 tsp pure vanilla extract (or use vanilla paste if you have - it's amazing!)
1 tsp pure almond extract

1/2 tsp allspice, ground
1 black cardamom, freshly ground in a mortar and pestle

1/4 tsp cloves, ground
1/8 tsp freshly ground pepper
Pinch of nutmeg, grated on a microplane (optional)
2 tsp. baking powder 1 cup buckwheat flour (be sure NOT to use a buckwheat pancake mix!) 1 cup (200gr) ground sliced or whole almonds (with the brown peel)
1/4 cup sour milk
16 prune plums, halved and pitted


- Preheat oven to 350F
- Whip butter and sugar with a blender.
- Add the eggs, vanilla, almond extract and spices.
- Add the baking powder, flour and ground almonds
- Add the sour milk
- Line a springform pan with parchment paper
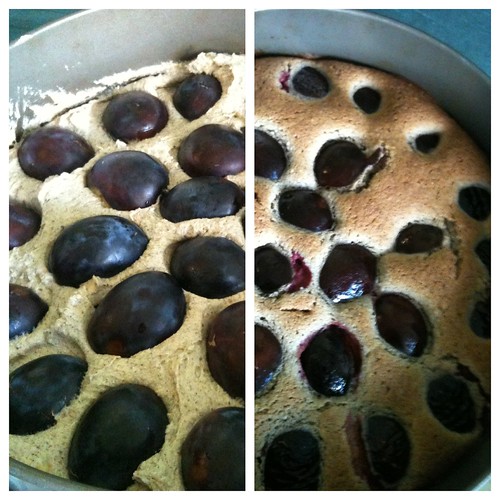
- Pour the batter and even it out with a rubber spatula (it is a rather solid batter, almost resembling a drop cookie batter)
- Place the halved prune plums, face down, and press slightly onto the batter
- Bake for 30-40 minutes (until a knife inserted in middle of the cake comes out clean)
Best served warm and fresh out of the oven; or wait till the next day - it actually becomes moister the next day! Best to keep in room temperature, so if you don't anticipate eating it within 3 days and you live in a hot climate, by all means refrigerate it and bring to room temperature before serving.

* Equipment you will need for this recipe:
Standup or hand mixer
12" spinrgform pan
baking parchament
rubber spatula
measuring spoons and cups
nutmeg grater
peppermill
mortar and pestle
Back to the top