
Incense Burning Methods

There are many different incense burning techniques - each incense tradition has a different method, or a few distinct methods in which heat or fire are used to release the scent of fragrant materials. I would like to introduce to you and explore the main ones, as well as explain the unique benefits and characteristics derived from each method.

Smudging:
Direct burning of a single plant.
The most primitive way of enjoying aromatics, is that of lighting them afire which in turn will release a thick, aromatic smoke. The most ancient way of doing this is by using a single raw aromatic, that is on its own combustible. It is, essentially, like burning a little fire (controlled and contained), of either a bundle of dried herbs, or a chunk of wood. This can be done either ceremonially, or for fumigation purposes (for example, as an insect repellent).
The most known culture to use this technique to this day are the First Nations of North America: in their smudging ceremonies, local botanicals such sage, sagebrush, cedar leaf, western red cedar, and sweetgrass are used for clearing a space and preparing it for a ritual, to cleanse the aura of a person, and for healing. A similar tradition and technique is used in Central America with Palo Santo chips.
Because these plants are only partially combustible, it is best to use a feather or a fan during the burning, to aerate the incense and continue its burn. This method is especially suitable for open spaces and the outdoors, where the wind can also help continue the burn. Additionally, the smoke can be quite strong and leave a scorched after-smell, which is not to everyone's liking as an "environmental scent" per se.

Singeing:
Another ancient technique, but slightly more delicate is that of singeing. This is an incomplete burn of finer botanicals, such as the fine fragrant hair of Mother Earth - sweetgrass, and also other botanicals that are perhaps not completely combustible, such as flowers, wispy leaves, conifer needles, and thin branches. Place them in a small heat-proof vessel such as ceramic bowl or cast-iron cauldron, and light with fire. Try using this technique for more delicate aromatics as well, pearly everlasting flowers for example.
Circle Style:
A method that you may be familiar with if you've ever attended a Sweatlodge ceremony: On a hot rock - usually a lava rock - or on a very hot iron, such as an iron cauldron or on top of an iron fireplace - one would place the fragrant botanicals or incense blend.
This enables enjoying the fragrance of materials that are not combustible on their own, such as fragrant resins and certain plants that are too delicate for direct burning. This method is used mostly in Sweatlodge ceremony, when different kinds of medicine are tossed on the hot rocks that enter the sweat lodge. The medicine person leading the ceremony would choose the appropriate plants and resins in each door to the elements, and throughout the prayers and chants: sage, artemisia, cedar leaf, pine needles, piñon pine resin, sweetgrass, copal and palo santo are most often used in this context; but it is technically possible to use any leaf, wood, resin or spice with singeing. Try using it for more delicate aromatics as well, pearly everlasting flowers for example.

Charcoal Burning:
You may be most familiar with this incense burning method from churches, but it is not the first tradition that used it. It has likely originated in the Middle East, where it is still used to this day. And there are many different types of incense that can be burnt over a hot charcoal, creating different experience and nuances, depending on the particular technique for creating the incense to be placed on the charcoal, as well as the individual botanicals selected. Charcoal burning releases a lot of smoke, and is suitable for larger spaces (such as the church) and the outdoors. It is quite an involved technique, requiring one to tend the charcoal, toss it and even fan on it occasionally, remove the spent material if it develops an unpleasant scorched smell, and regularly sprinkle with new fragrant incense on top. What usually determines the length of time during which this kind of incense will be burnt is the size of the charcoal, as usually only a small amount of aromatics is needed to release a lot of scent. The other factor is of course the sizes of space, and the stamina of the attendees.
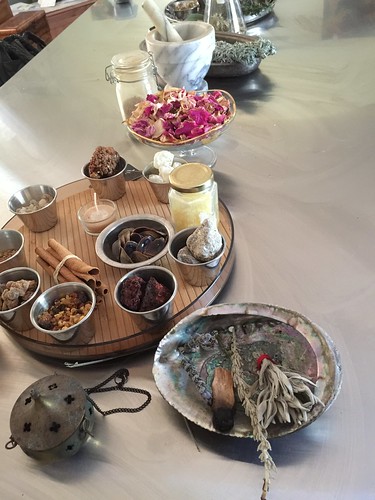
For this method, several tools are required:
1) Censor - a special vessel that is heat proof to hold the charcoal and the ashes. If you do not have a designated censor, you can use a heat-proof ceramic bowl filled with sand, and place the charcoal on top. This will also enable you to handle the bowl more easily (the copper censors become unsafe to handle, which is why most of them have a chain).
2) Tongs - for handling the charcoal and the incense
3) Matches, a lighter or a little torch (the one used for burning off the sugar and forming the desired crust on creme brûlée).
4) Charcoal - it is best to use saltpetre-free charcoal, but that will also mean you'll need a good lighter and a lot of patience to wait for it to light up. You may use coconut charcoal that is used for shisha (waterpipe), or the fine, high-end Japanese bamboo square charcoals used in Koh-doh (more on that later) - but these are costly and run out really fast. I find that the easiest way to light both of these types of charcoals is by simply placing it on the small flame of a gas stove. So if you have one use it as well. Let it sit there for a few minutes, until the charcoal gets covered with a silvery looking ash. If you don't have a gas stove, the other solution to lighting saltpetre-free charcoal is by using a small torch, like the kind you'd use to burn the sugar off the surface of Crème Brûlée. If you place the incense on it earlier, it will either suffocate the charcoal, or create an unpleasant smell from an overly rapid burning of your incense.
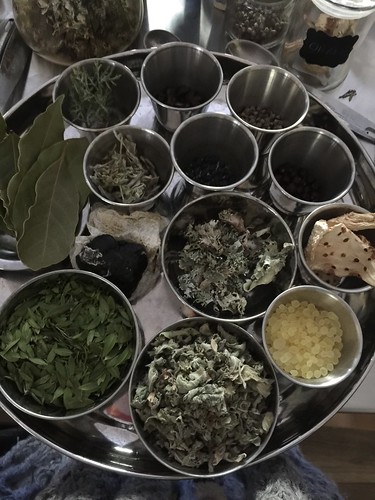
Single Pure Resins:
Frankincense and myrrh are most famous for use on hot charcoal, but they are not the only ones - benzoin, mastic, sandarac, dammar, copal, ammoniacum, etc. are examples for other important fragrant resins from around the world.
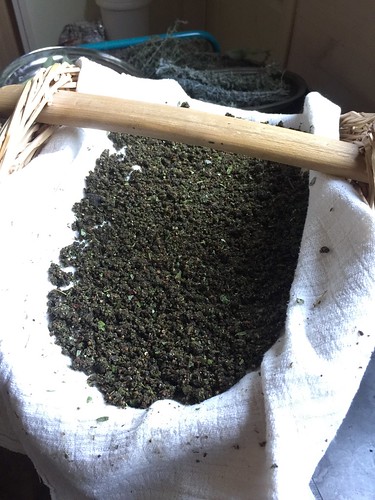
Loose Incense:
A mixture or resins, or resins with other aromatics - wood chips, spices, herbs, citrus peel, flowers and more, that were carefully design and blended, and preferably also aged prior to burning.
Incense Pastilles:
Most known for their use in the Greek Orthodox church, incense pastilles are a compounded mixture of fragrant resins, spices, woods, flowers, herbs etc, that are finely powdered and then bound together with liquid (either water, wine or alcohol). Nowadays, most of the incense pastilles found commercially are a mixture of franckinense, benzoin and synthetic aroma chemicals bound with gum. That's why you'll find many flowers that usually aren't that useful in incense in their dried form; or are just way too experience to use as an extract (essential oil or absolute). Incense pastilles may be either an irregular shape, usually dusted with golden mica powder for visual effect; or is pressed flat and then scored into small squares or diamonds, in the Greek Monastery fashion, and typically dyed with colours that would match the flower they are perfumed with (i.e.: pink pastilles that are rose-scented). Pastilles are burnt just like any other resin, small pieces are broken, and sprinkled onto the charcoal as needed throughout the ceremony or event.
Kyphi
Considered the first perfume in history, whose formulae was found and translated by the Greeks on several papyri; and a couple of others recorded on temple walls in Egypt. Kyphi contained 16 distinct botanicals, processed in many elaborate steps over the course of several weeks, resulting in a sweet, haunting perfume that is both sensual and relaxing. All Kyphi formulae containing besides the aromatics also honey, raisins and wine as binders - whose sugars produce an impressively thick and sweet-smelling smoke. It was burnt in the temples at the close of the day, in preparation for dream work; and by the aristocracy to banish the worries of the day, as well as a personal perfume. It was even ingested as medicine. Nowadays, recreations and reinterpretations of Kyphi by artisan incense makers are usually burnt on a charcoal as well, but also used in the next method we'll describe, which is smokeless.
Incense Warming:
Incense warming is a most refined and economic way to enjoy scent. Rather than burning or evaporating it rapidly, as you would with incense you light on fire, or perfume you apply to the skin after being years in the making - incense warming is a technique that uses a fraction of the amount of incense material, and gets impact over a long period of time.
There are a few methods of incense warming, the most sophisticated is the Japanese technique of filling a Koh-Doh cup with rice-ash, in which a fully lit bamboo charcoal is buried. The fine and fluffy ash allows it to continue "breathing". On top of the charcoal, there is a tunnel in the ash, upon which a thin square of mica - called a mica plate - is gently placed. The mica transfers the heat in an even way for as long as the charcoal ember is alive. On top of this different fragrant materials - usually hair-thin slivers of precious woods are placed, or Neri-Koh. Resins are less ideal for burning in this method, because they melt and ooze out and leave a mess on the mica plate that could spill over into the ash. The main disadvantage of this method is that is requires expertise and specialized tools for every step, otherwise the precious woodchips would fall into the rice ash and disappear, or the mica plate may topple over when the scents are switched around. Another aspect to take into account is is that there is a finite time for this incense, only long as the buried charcoal ember is alive - and only an experienced koh-doh master can time this out properly. The main advantages are the very fine scent one gets from the materials, it is definitely most suitable for precious woods such as agarwood. And it is inherently ritualistic and ceremonial, creating a very special atmosphere and reverence for the materials and the occasion. Another neat thing is that the Koh-Doh cup can be held by the participants and lifted very close to one's nostrils, to fully appreciate and experience the scent. The passing around of the cup creates intimacy and anticipation, and creates an even greater enjoyment, as well as bond between the participants.
Simplified, less ceremonial methods that don't require much expertise and produce similar results are either with an aromatherapy diffuser or an electric incense heater. Both of these methods are very easy to use and clean between materials, and can be used also for sticky resins, as well as Kyphi - just like the aromatherapy diffuser.
You will need a simple, low-tech aromatherapy diffuser, preferably made of porcelain or glazed ceramics, or possibly pyrex glass, which is easier to keep clean and spreads the heat gently but evenly. Place the incense materials in the bowl on top, and light the candle underneath. This will produce scent for hours - sometimes the incense materials may even outlive the candle. The disadvantage is that this apparatus gets very hot to handle, and can't really be lifted up and sniffed up close or passed away among friends like you could do with the the Koh-Doh cup. If you don't have a porcelain, pyrex or glazed ceramic bowl for the aromatics, you may place a small piece of aluminum foil over the bowl to line it and prevent cross-contamination of fragrances from burnt or melted over resins, honey, raisins, etc.
An even simpler way is more high-tech, and requires an electric incense heater that was especially designed for this purpose. They are usually made of porcelain and shaped as Koh-Doh cups, and produce a very fine scent, for many days, from a very small materials. There is often also a temperature control dial which helps control the heat and adjust it appropriately for different substances. A disadvantage here again is the inability to handle and smell the aromatics up close when they are burnt, and also that this apparatus is even less portable than the aromatherapy diffuser, as it is plugged into electricity.
Now let's explore the types of incense materials used with the heating methods:
Single Woods (as in Koh-Doh Ceremony):
In the Edo period, the Japanese aristocracy and Samurai classes have perfected the art of incense, focusing entirely on woods: local woods such as hinoki and hiba, as well as the imported fragrant woods of sandalwood and agarwood (jinkoh).

Nerikoh:
Similarly to Kyphi, nerikoh also contains honey and dried fruits, which adds an inherent sweetness to any composition. In both cases, it is believed that the sweeteners were used to sugarcoat the bitter spices and herbs before ingesting them, as a medicinal preparation (before the invention of capsules and softgel and pills). Literally, nerikoh means "kneaded incense". An incense "dough" of spices, woods and resins is prepared, with honey and dried plums or apricots to bind them together. They are rolled into capsule-sized pellets, and aged for a minimum of six months. Nerikoh is traditionally enjoyed in autumn during Cha-Doh - the Japanese tea ceremony. Just like the slivers of woods enjoyed in Koh-Doh, Nerikoh is placed on the heated micah plate. Modern incense enthusiasts both in Japan and abroad also warm it on an incense heater - either electric or over a tea light candle.
Combustible Incense:
The most user-friendly and simple to burn is also the most sophisticated incense to make. Combustible incense is incense in which both aromatics, binder and combustible agents are masterfully blended to make an incense that is self-burning. These are shaped into a few different forms, and each has its own unique characteristics.
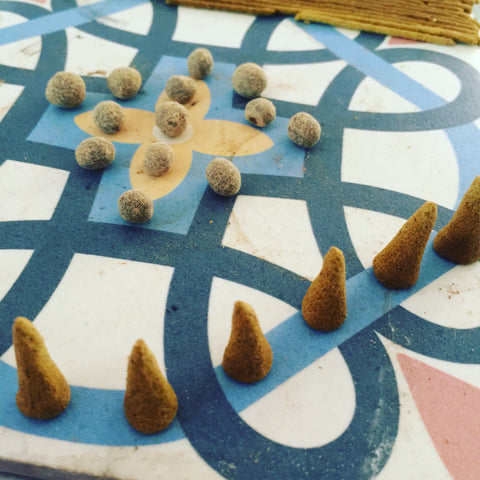
Incense Cones:
Originated in Japan in the 19th Century, incense cones are now also very popular with Indian incense. They can be either hand-shaped or shaped with a mold, and have a thick enough base to make them stand on their own. That makes them very easily portable and enables them to burn on any heat and fire proof surface, without the need for any special tools or dishes. You can even burn them outdoors on the ground. Cones are low maintenance to burn (as long as they were properly made). They are easier to make and use for amateur incense makers. Because a larger amount of incense material is burnt as the ember proceeds down the cone, it burns relatively fast, and produces more smoke and more charred aroma, especially with materials such as herbs, and that makes them burn in a less refined way than the sticks.

Agarbatti (Incense Sticks with Bamboo Core):
Originated in China, and also very popular in India, are incense sticks with a bamboo core. Higher end sticks used to have a sandalwood core. Either way, the core gives the incense stick durability during transport, and also a very accessible way to hold it upright wherever it may be required. Because of its unique aromatic makeup, Agarbatti tends to have a thick and lingering smoke, and also is slow to burn. You may even find that you'd like to put it out before it gets consumed on its own. Some find that the bamboo core is a destruction from the scent and making it less pure, but I haven't noticed that to be of significance as the bamboo has a very neutral scent.

Dhoop or Masala Sticks (Core-less Incense Sticks):
The most sophisticated incense blends are offered in this format: from the relatively thick medicinal, herbal incense of rich exotic aromas coming out of Tibet to the finest Japanese incense, which is both delicate and without hardly any smoky off-notes, as well as the thinest sticks made anywhere in the world. The incense requires a special vessel with the correct size hole to hold the stick in place, as well as receipt its ashes. Because such incense does not have a core, the very end bit of it will always get "wasted" if using such a dish. An even more refined way to enjoy this type of incense is placing it horizontally inside a kodoh cup or in a bowl filled with ash. This ensure the stick burns in its entirety. Another thing to keep in mind for this sticks, is that they break more easily. This is an advantage of course when wanting to portion them out and make them fit horizontally into an ash vessel. Another neat thing about incense sticks, is that they may be used for measuring time. They were used in such manners for many purposes, from telling time in general, with sophisticated incense that would change scent at certain time intervals; Geishas used to bill their clients based on how many incense sticks would need to be burnt; and also, a practice we still use today is to frame a meditation practice with a certain scent that lasts a certain amount of time (most incense sticks burn from 20-60min) . What makes them perfect for meditation, is that they can be left alone to burn, being "low maintenance" during burning time; and also once the scent is over, one knows it's time to bring the meditation to a close.
Incense Coils
Simply a different shape for the same type of incense as cones or dhoop, only shaped into a spiral. These could be shaped into very large and slightly flexible coils that can be hang from above from the centre of the spiral, and the flexibility allows the weight to pull them downwards without breaking. Smaller coils which are more stiff would either have a hole in their centre to attache them to a holder from underneath, or they can be placed on rice ash in a Koh-Doh cup. The advantage of incense coils is that they take less space and burn for much longer than a straight stick would.
Pliable Dhoop
A form of incense which I have encountered only once, is a pliable dhoop, or incense dough, that remains soft after its been aged. This is due to a unique makeup that I'm yet to figure out, but supposedly key components are both from the Holy Cow: dried up and finely ground cow dung, and clarified butter (ghee). One would form a "snake" and coil it up into a spiral for storage. When burning the incense, a small piece of the "snake" is pinched and pressed into the wall, dangling down. The bottom tip is lit and the ember would travel up, while the ashes fall to the floor. Somehow I imagine it especially befitting if you dwell in a cave and don't care about the walls and the floor getting covered in ashes and charred marks.
Incense Trails:
Incense trails are even more sophisticated method of burning incense, in which special designs of combustible incense powder are sprinkled onto rice ash, then lit up. To be done properly, it does require expertise and special tools, including ornately designed presses that look like mazes and may also be used for time measurement. This is more of a lost art, although some incense makers still use this method to test their combustible blends before shaping them into cones or sticks. in Korea this practice was especially developed, and is on the verge of becoming lost.
Incense Ropes:
Tibetan-style incense, in which the powdered mixture of combustible incense is enclosed in Tibetan handmade Lokta paper, which is then twisted into a rope shape and folded in half. There's a little hoop in the middle that is used for holding the incense on a hook upside down. Like the dhoop snake, it is lit from the bottom. Another good method for cave-dwellers and long dark hallways of monasteries. The spent paper leaves quite a bit of a mess. But it's worth it for the exotic earthy scents of the Himalayan incense plants.
Papier d'Armenie (Incense Wafers):
European tradition of soaking card-stock or thinner paper in a solution of saltpetre, benzoin, styrax and other aromatics. These are left to dry out, and then folded into zig-zag so they can stand up. They're lit and blown out and still burn rather rapidly due to the saltpetre. The scent is usually very powdery, sweet and slightly floral. It's a very short-lived and very old-fashioned smell.
Summary:
There are many ways to burn and enjoy incense, and each fits a certain mood, settings and intentions. Find the right method that suits your lifestyle, needs and of course the occasion. You may find you have more than one favourite method of burning incense for different occasions. They are all wonderful, and a creative way to add scent to the day and enhance well-being.


 March 12: