s

SmellyBlog

Happy TuBishvat!

Early Almond Blossom by Ayala Moriel
Early Almond Blossom, a photo by Ayala Moriel on Flickr.
It's full moon & the New Year of the Trees (a rather obscure Jewish holiday).

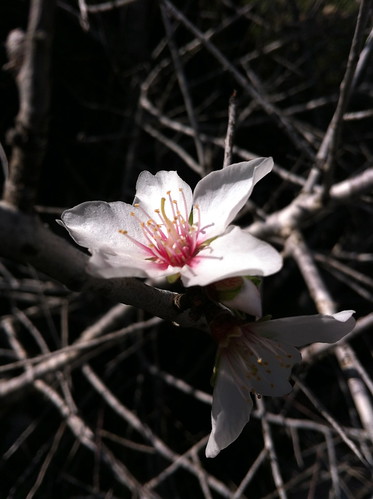
If you have an almond blossom perfume, now is the time to wear it - the almond trees are traditionally in full bloom at this time of the year in Israel (though the almond flower in the picture was taken sometime in mid December). There aren't too many almond perfumes in my repertoire, or in my collection. Farnesiana  with its violet-macarons and marzipan aroma comes to mind. Oh, and there is also the almost forgotten KenzoAmour LeParfum, as well as a couple of soaps I adore - l'Occitane's Almond Delicious exfoliating soap and Royal Herbs' Honey & Oatmeal soap. And last but not least - Gabriel's Aunt Biscotti candle.

Tomorrow would be a good day to spend time in nature, noting and contemplating the early awakening and preparations of the plants and animals for the end of winter. The winter might seem endless but it's already showing some signs of weakening...

And back to the topic of almonds - it's a note that's mostly associated with benzaldehyse - that molecule that smells like bitter almonds, although isn't quite bitter on its own. It's what you taste in almond extract, and most cherry flavouring. Pure, 100% natural bitter almond essence is hard to find because of some legalities . For food use, the prussic acid (aka cyanide) must be removed, and you have to show some certification before purchasing it even for fragrance use.

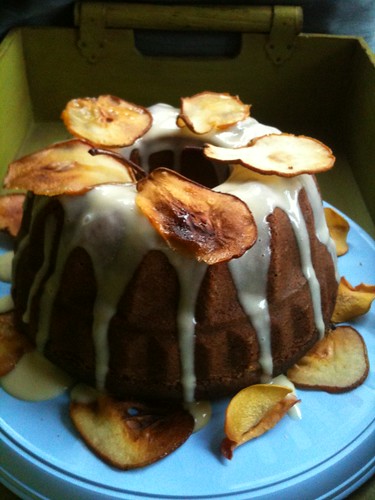
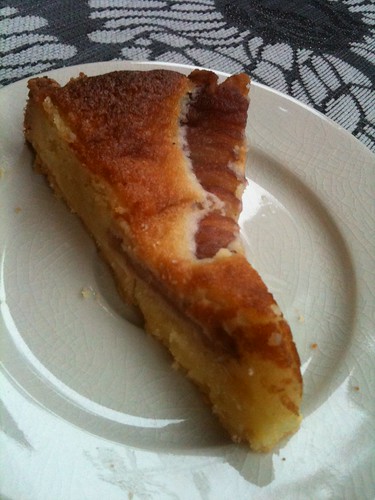
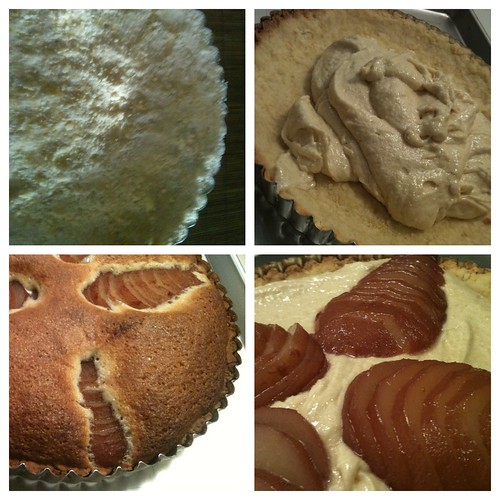
And there is also the caramelize almond like aspect of tonka beans, a characteristic of coumarin. You'd also find coumarin in high doses in hay absolute and liatrix (deer's tongue) absolutes. However, neither remind me of almonds as much as tonka beans: they smell more like luscious raisins. Also appropriate for Tu BiShvat, when dried fruit get more attention than any other time of the year.

Last but not least: heliotripin, which is hard to find as a natural isolate (but naturally occurs in Tahitian vanilla beans). Also known as piperonal, it smells like marzipan and cherry pie, and very much like the flower heliotrope - sheer heaven. 

Pear Bundt Cake

Spiced Pear Bundt Cake by Ayala Moriel
Spiced Pear Bundt Cake, a photo by Ayala Moriel on Flickr.
After a long day of bad news from Israel and Gaza, I just had to do something relaxing and positive. I baked a bundt cake. Flipped it over on the cake stand. Buried my nose in the midst and indulged in the comforting steam of baked butter, honey, spice and caramelized Flemmish pears. I wish I could send some of this comfort to all my family and friends in the war zones.

Pears are a relatively new obsession of mine - poached, or in a brie sandwich, or better yet - in a frangipane tart - there is something utterly luxurious and elegant about this rather humble-looking, delicately flavoured and subtley textured fruit.

This cake is another way to enjoy pears, especially if you happen to be greedy like me when they are in season, and buy a few extra ones that got a little too soft for poaching or sandwiches... It requires making a home made caramelized pear sauce or puree - which sounds complicated, but is really a breeze. The original Martha Stewart recipe that this one is based on instructs you to peel the pears. But I felt that this took away a bit of the texture. So my recipe is my own little twist on the theme, and in my opinion feels more pear-y, which is what I'm after. You will need at least 5 pears for this recipe (6 pears if you are decorating it with the pear chips).

A little note about the bundt mold: Yes, you will need it. I'm not a fan of having a special piece of equipment for every type of cake under the sun. However, there are some exceptions (i.e.: Madeleine molds, heart cookie cutters...). But yes, even though I waited about a million years to get my bundt mold - it's totally worth the investment. It has opened up a whole world of recipes for simple yet elegant and impressive cakes right before my eyes. And now also yours. Do it!

For the Caramelized Pear Sauce:
1/3 cup evaporated cane sugar
5 pears, cored and cut into medium chunks (peeling optional)

- Spread the sugar evenly in a wide sauce pan and cook on medium heat until the sugar on the edges starts to brown.
- Stir just until all the sugar has melted, and immediately add the pears.
- Cook the pears while stirring occasionally. 
- Once the pears are soft, use a potato-masher to make a chunky pear puree.

For the batter:1 cup (2 sticks) unsalted butter, softened in room temperature
1 cup evaporated cane sugar
4 large eggs, in room temperature
1/2 cup honey
1 tsp pure vanilla extract
1/2 cup buttermilk
1 Tbs freshly grated ginger root 
2 cups spelt flour
1 cup (100gr) ground blanched almonds (aka almond meal)
2 tsp baking powder
1/2 tsp baking soda
1/2 tsp salt
3/4 tsp ground cinnamon
3/4 tsp ground cardamom
1/4 tsp freshly ground black pepper

- Preheat the oven to 350F (180c).
- Sift together dry ingredients (flour, almond meal, spices, salt, baking powder and soda).
- In a large bowl, beat together the butter, honey and sugar in medium speed, until fully creamed and fluffy, about 4 minutes.
- Add the eggs, one at a time and continue beating for .
- Add the vanilla extract and continue beating for a few more seconds.
- Reduce to low speed and add about third of the dry ingredients and beat until just combined.
- Add the pear sauce and beat shortly.
- Add another third of the flour, and continue beating just until combined.
- Add the buttermilk and continue beating just for a few more seconds.
- Add the remaining flour, and beat briefly - just until the last bit of flour is incorporated into the batter.
- Butter a bundt pan and dust with more spelt flour. Tap out excess flour.
- Carefully pour the batter into the pan and spread until even.
- Bake for 40-45 minutes, until a toothpick or cake tester inserted in the middle of the cake ring comes out clean.
- Remove from the oven and let cool for about 5 minutes. While the cake is still warm, invert it on a cake tray or case, and allow to cool completely before decorating it with powdered sugar or the suggested decoration below. Only once cooled, you may cover it with a lid or a glass dome.

To decorate the cake:

A simple decoration for this cake would be a little dusting with powdered sugar, which is elegant and pretty and perfect if you're just making the cake for yourself and your family or casual entertaining. If this is for a special occasion - this cake can make an entrance that is in my humble opinion more impressive than some of the most sophisticated layer cakes I've ever made. And still quite simple to carry out.
For that, you will need to create a cream cheese icing, and candied pear chips (recipe below). The white icing looks regal and sensual set against the dark, caramel-coloured spiced cake. Add to that homemade candied pear chips - and you're up for a memorable fall cake that is reminiscent of fallen leaves on fresh snow. Delightful for both your eyes and taste buds!

For the Cream Cheese Glaze:
4oz cream cheese at room temperature
1/2 cup powdered sugar
1 Tbs freshly squeezed lemon juice
3 Tbs milk, more if needed
1/2 tsp vanilla paste or vanilla extract, or the "seeds" scraped from half a vanilla pod. 
- Whisk the ingredients together with a wire whisk or with an electric mixer.
- Drizzle all over the cake once it is cooled, one tablespoonful at a time on the top - it will run down the streams created by the bundt mold and is sure to be pretty!

For the Candied Pear Chips:
1 unripe pear
1 cup granulated or evaporated cane sugar1 lemon, cut into half
1 cup Water

- Preheat the oven to 200F (95c). Line a baking sheet with parchament paper or Silpat.
- Shave the pear lengthwise using a mandolin (I tried it without a mandolin and it does not work - so here's another kitchen investment I had to make...). There is no need to remove the core of the seeds - they will add to the visual appeal of the pear chips, and during the baking process they will become easily edible.
- Rub half a lemon on each pear slice (to prevent it from browning).
- In a saucepan, combine water and sugar and bring to a boil. Cook until the sugar has completely dissolved, and keep it simmering.
- Put the pear slices in the pot and cook for 2 minutes. Remove from the pot with a  slotted spoon, and drain on a sieve. 
- Spread the drained slices on the lined pan. Bake in the oven for about 20 minutes - until crisp but not brown.
- Once cooled, place the slices atop the glazed bundt cake.  Doesn't it look spectacular?

Pear and Almond Frangipane Tart

Pear & Almond Frangipane Tart
Frangipane tart was in my dreams for longer than I can remember... Maybe it's the name, which reminds me of a beautifully scented tropical flower that brings fond memories of summers in Tel Aviv. But most likely, it's the seductive, velvety appearance of the dessert's middle layer, partly concealing the fruit in the most seductive of ways...

When passing by a bakery in Paris (May 2009) that had a similar apple tart in their window, I promised myself to get a slice when I return to the apartment where I was staying... By than it was closed, of course. And the next mornings, I passed by it too early in the day before it opened. So there was my chance to have a frangipane tart Parisienne... It's actually a specialty of the region of Bretton, where it is traditionally baked with apples. The variations on this theme are countless - usually almonds, but sometimes other nuts (pistachio, hazelnut...) and most commonly the fruit is from the rosacea family (apple, pear, apricot, plum, cherry...).

Fortunately, I found a great recipe with a crust that is super easy to make - Dessert First' adaptation of Dorie Greenspan's recipe. So, I got myself a tart pan with a removable bottom for the first time in my whole life. From this point, there was no return. Unlike many other frangipane tarts, you don't need to roll out the dough (which is the single most intimidating part about tarts: the dough is always full of butter, which must remain cold and not be over worked for the pastry to turn out flaky and light). It's difficult to roll cold butter (try it!) and I find it quite frustrating. Besides, you end up with a counter covered in sticky dough and flour...

The other think I love about this recipe is its efficiency in using up all the materials. The dough requires one yolk. There is nothing I like less than wasting half eggs after working so hard to separate them... So I was excited to discover that in this recipe, since the frangipane part (aka the almond cream) requires one whole egg and one egg white, the extra egg white remaining from the crust will not go to waste. Phew...

Begin by poaching the pears (previous recipe). 

The Making of Frangipane Tart
Pâte Sablée

1 1/2 cups flour

1/2 cup powdered sugar

9 tablespoon very cold salted butter*, cut into small pieces

1 egg yolk

Mix the flour and powdered sugar.
Cut the butter in and blend with a manual pastry blender until tiny crumbs form.
Add the egg yolk and knead as little as possible - just until it can form a ball of dough.
Press the dough into a 9" tart pan (with a removable bottom). Excess dough will be used later to patch up the crust after the 1st round of baking...
Freeze for 30 minutes or until the almond cream is ready and you're ready to bake the tart!
When you are ready, preheat the oven to 375F. Cover the tart dough tightly with a sheet of buttered aluminum foil and bake for 25 minutes, until the crust becomes dry and slightly golden.
Take out of the oven, remove the buttered aluminum foil, and let cool completely before adding the frangipane cream filling...

And while the crust is chilling in the freezer or out of the oven - make the almond cream (which is the Frangipane itself!). This is actually the easiest part of the whole thing (aside from eating the tart...). By the way, it is named after the Italian marquis Frangipani, after whom the flower is named as well (the reason for that being, that the Frangipanis worn the first scented gloves of that particular combination - containing a large amount of orris, by the way... When the flower (Plumeria alba) was found, it reminded its discoverers of that same Frangipani perfume, and named the flower after it... Frangipani in Italian means "Breadbreakers". So... If you can't find bread, eat frangipane!

Frangipane
(Almond Cream Filling)

6 tablespoons salted butter*, at room temperature

2/3 cup raw cane sugar

100gr ground blanched almonds (which, fortunately, is the entire bag of blanched ground almonds you get in most grocery stores).

2 teaspoons flour

1 teaspoon cornstarch

1 large egg

1 egg white
(remaining from making the crust!)

1 teaspoon pure vanilla extract

2 teaspoons pure almond extract

Blend all ingredient with a mixer. Fill the partly baked crust only after its cooled down completely to room temperature. If the crust needs any patching with more dough - now is the time to do it.
Fill with the almond cream (it should be a little on the firmer side, but still easily spreadable evenly within the tart shell. Slice the poached pears into 3/8 thick slices. Place on a flat spatula and transfer 4 halves of pear in total onto the frangipane filling. Press a little so that the slices separate nicely atop the tart.

Bake the whole tart until the almond cream filling is golden and puffy. Watch your oven closely, and listen to your nose to check the tart before your timer goes off! Mine took only 30 minutes to bake, instead of the 40-45 minutes the recipe anticipated it would take. You may want to garnish it with powdered sugar, or brush with a light coloured jam (i.e.: peach or apricot) but I find either unnecessary. This tart is sheer perfection just the way it is!

Serve the frangnipane tart in room temperature (if you don't think you'll finish it within 2-3 days, store on the fridge, but you MUST bring it back to room temperature before serving. It's also delicious while still warm and fresh from the oven, which is how I enjoyed it for the first time around 9pm on September 28th... It's not really that complicated, but it does have quite a few stages and a fair amount of waiting and cooling - and since I was doing other things that day, it took me the entire day to complete this dessert. At the end of the day, I found it to be more satisfying than other layer cakes I've baked in the past (Gianduja, Tiramisu, Black Forest Cake...). Certainly a day to remember!

* A little note about the butter: most recipes for pastries and sweets call for unsalted butter. Which is really clever, except that they always add more salt in the end... If only unsalted butter was not twice as much as the salted, I'd say go for it. But since the recipe asks for salt anyway in the end, why not save the time of measuring and save a few dollars, and opt for the salted butter... That's what I keep on hand anyway for miscellaneous butter uses.

Apricot Almond Cake

Apricot Almond Cake by Ayala Moriel
Apricot Almond Cake, a photo by Ayala Moriel on Flickr.

Summer is here and the fruit is ripe - and gets overripe before there's time to completely enjoy it... So some has to become this cake, which is one of my favourite cakes ever... It's the second week in a row that I'm making it and we have no trouble finishing it up - and thankful whenever there is a guest over to help us out!

It's super simple to make, and the best part - it smells so beautiful when it bakes - nothing quite like pastries baking when they have loads of almonds, butter and vanilla in them!

10 Tbs. salted butter, room temperature
2/3 Cup sugar
1 tsp. pure vanilla extract or 1 tsp. vanilla paste
¼ tsp. pure almond extract
3 eggs
1 cup unbleached white flour
1 cup almond meal (100gr)
2 tsp. double acting baking powder, or 1 package German Backpulver
1/4 cup sour milk (you may also use buttermilk, but sour milk is better in my opinion)
About a dozen fresh apricots – or enough of them to cover the cake’s surface

Preparation:

•Use an 11 inch springform pan, lined with parchment paper.
•Cream the butter with the sugar, vanilla and almond extracts.
•Beat in eggs, one at a time.
•Sift the flour with the baking powder Beat into the egg mixture. Add the buttermilk and mix well.
•Spread the batter into the baking pan.
•Place the apricots on top, cut side down.
•Bake at 350°F for 30-40 minutes, or until a knife inserted in the middle comes out pretty clean (as long as you don’t insert it through the fruit!)
•Wonderful served warm, but keeps well for a 2-3 days (if it lasts!). If you refrigerate, bring to room temperature before serving.

Tier 4: Sweets


Sweets, originally uploaded by So Misguided.

I'm so proud of the chocolate & orange flower Madeleines (on the left) - they turned out amazing, and this is my first time making Madeleines!

The brownies, which I intended to infuse with thyme (bad idea, so I backed up on that plan, even though the idea came from a very innovative French patisserie). Instead, I created the most perfect (in my opinion) chocolate brownies with a bit of caramel and roasted walnuts. A simple and honest yet absolutely decadent flavour, which is my own recipe, and has no gluten! I'm so proud of this number I will be making it again and again and again.

And last but not least - in the background are my almond & grapferuit friands. Friands are moist and buttery little almond pastries made with almond meal, egg whites and little flour that are drenched in syrup. In this case: ruby red grapefruit and lemon verbena syrup. I'm so smitten with them, and also very glad to report that after 3 days they are just as good!
My recipe eliminated flour altogether because I had to accommodate some wheat intolerant guests - I used potato flour instead.

  • Page 1 of 2
  • Page 1 of 2
Back to the top